


Great reasons to buy from us:
-

Free Shipping
Enjoy free shipping when your order exceeds $79.99 -

Fast Delivery
All orders dispatched same day if placed by noon EST -

Warranty
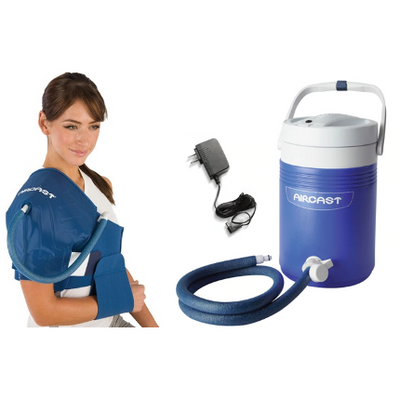
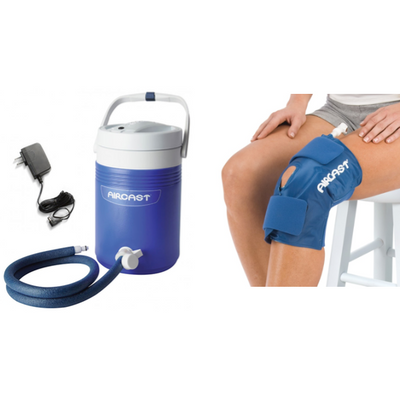
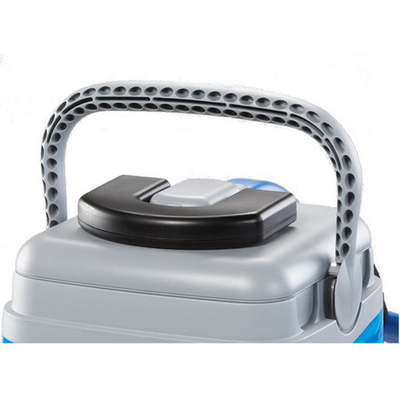
All cold therapy machines come with a 6 month (from date of purchase) manufacturer's warranty


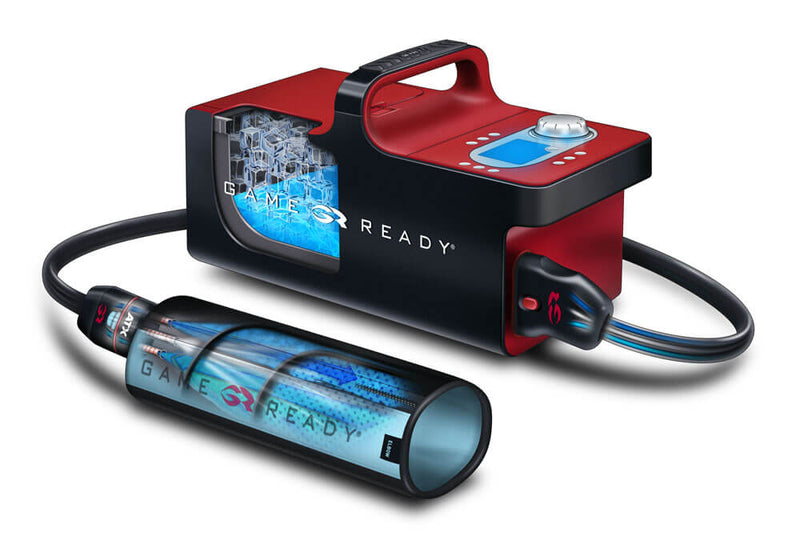
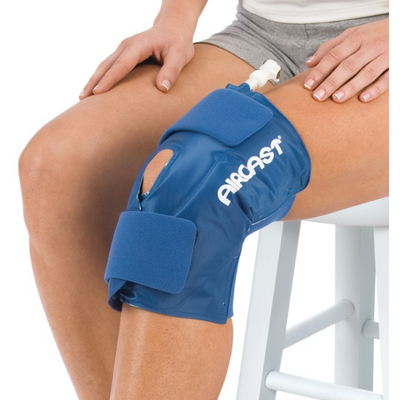
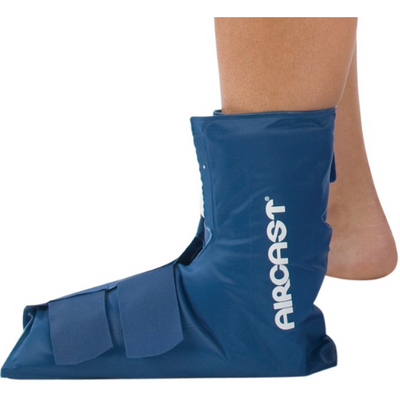
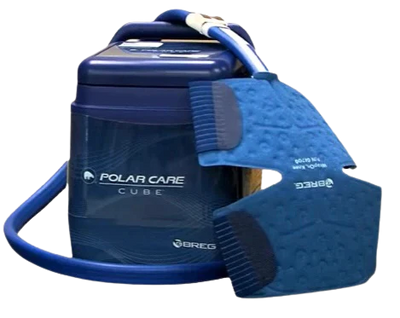
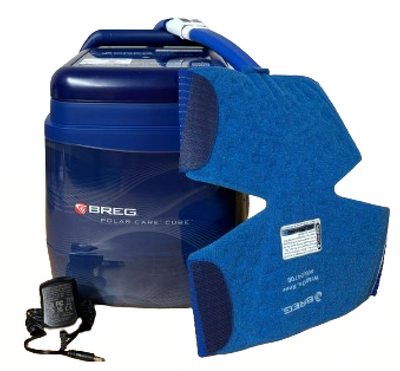
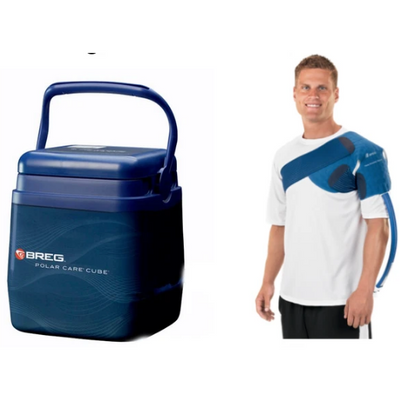
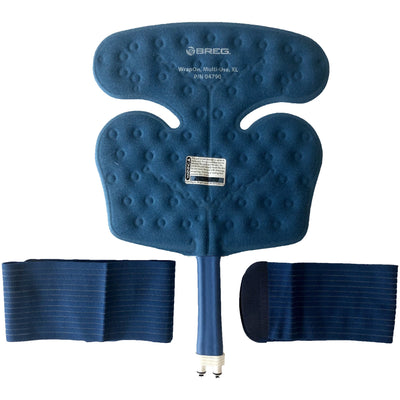
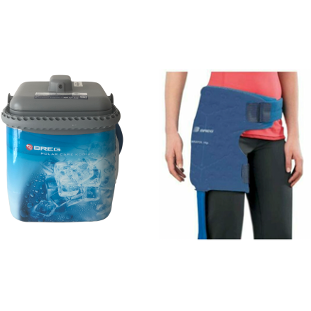
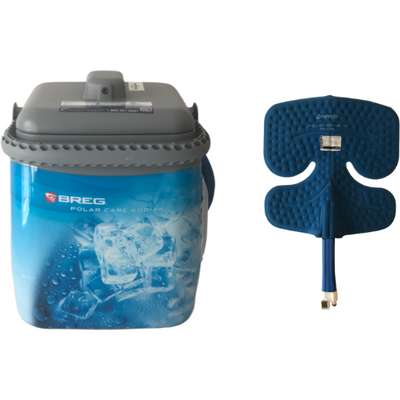
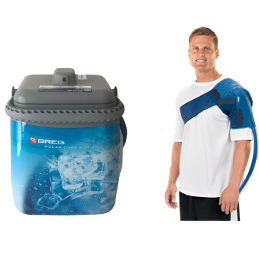
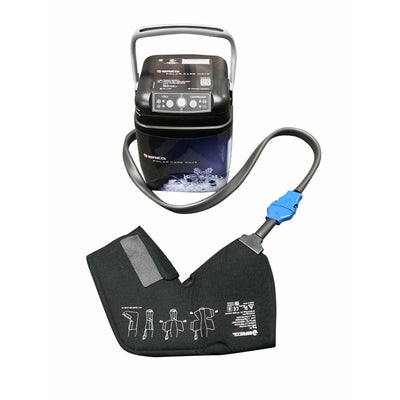
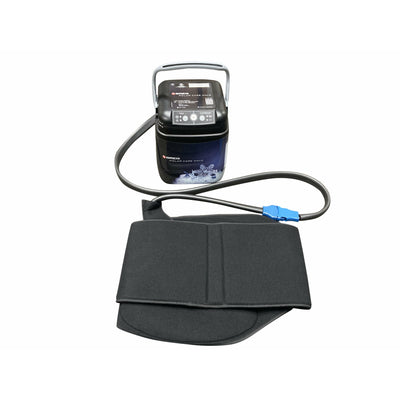
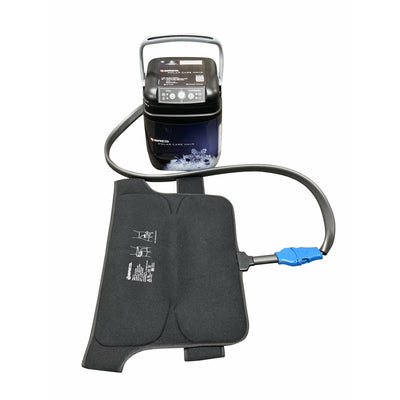
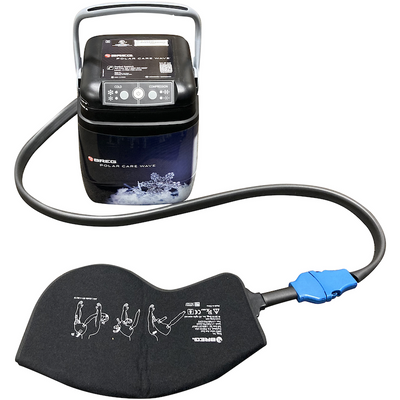
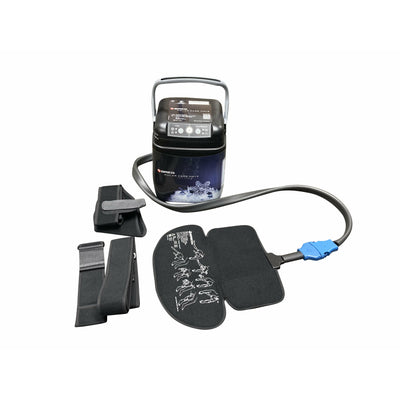
The Game Ready Knee Sleeves / Wraps
There are 5 core advantages to the design of the Game Ready Wraps and Sleeves and when you are recovering from an injury or trying to achieve peak performance quality design and engineering count. The Game Ready dual-action wraps offer you targeted solutions for injury and surgery recovery.
Let's dive in...
Unlike all other sleeves and wraps, the Game Ready wraps have an inner and outer layer. This is important because if you use the ice machine daily, the wrap will get kinda gross! So the outer sleeve is washable while the inner sleeve is where all of the intelligent design is located. So you can have a cold and clean cold therapy session each and every time.
 The sleeves are designed to deliver circumferential therapy. This means that not just the front of your knee gets the cold therapy but the front back and sides as well. Most competing cold therapy systems have a gap in their cold therapy coverage, but not Game Ready!
Compression therapy is part of the 3rd generation of cold therapy treatment and Game Ready leads the way by offering pneumatic compression which enables the sleeves to contour to your anatomy.
Speaking of anatomy, you will not see a "universal" wrap in our lineup. That's because Game Ready has specifically engineered all of their wraps to fit your anatomy like a glove. Once you have it on, you will feel the distinct difference between fit and cold.
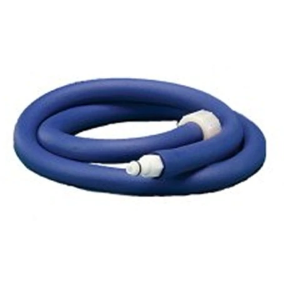
 Finally, the quick-release hoses allow you to snap in and out of your cold therapy treatment quickly. Why struggle when you are trying to recover?
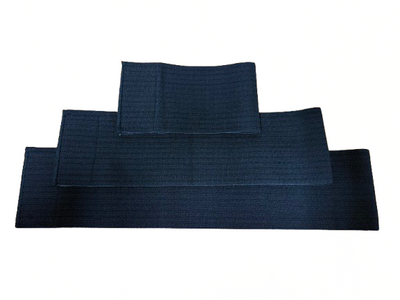
Game Ready Knee Wrap Size Chart
|
Description |
Size |
Type |
Catalog # |
 |
Straight Knee Wrap with ATX (one size fits all) One size – 17” long, 32″ circumference at top, 24” circumference at bottom |
Straight |
590100-03 |
|
 |
Articulated Knee Wrap with ATX (one size fits all) |
Articulated |
590100-03 |
POTENTIAL APPLICATIONS
- An anterior cruciate ligament (ACL) injury or surgery
- MCL, PCL, LCL injury or repair
- Meniscus tear or repair
- Uni knee replacement
- Patellar tendon tear
- TKR / TKA total knee replacement or total knee arthroplasty
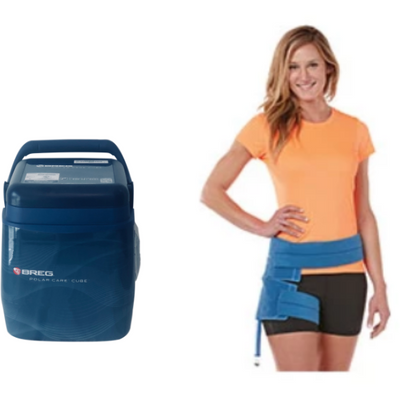
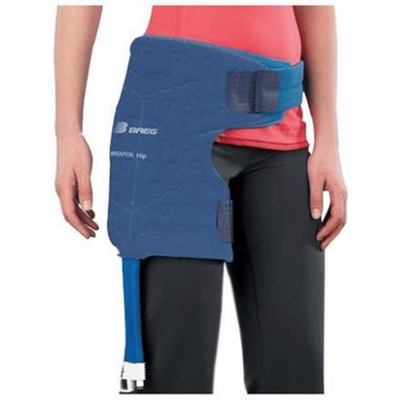
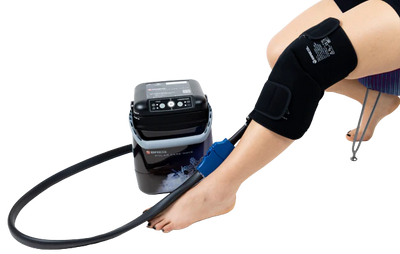
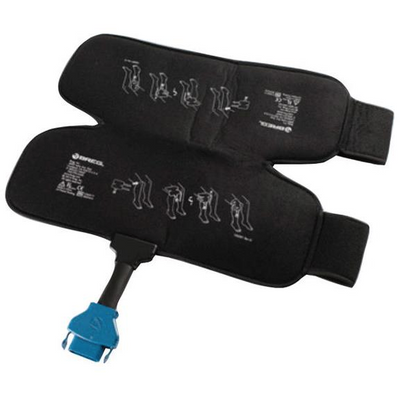
Articulated Knee Wrap Instruction

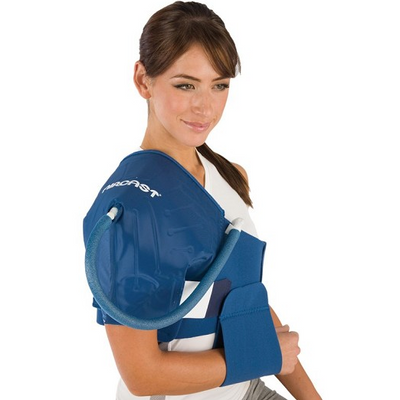
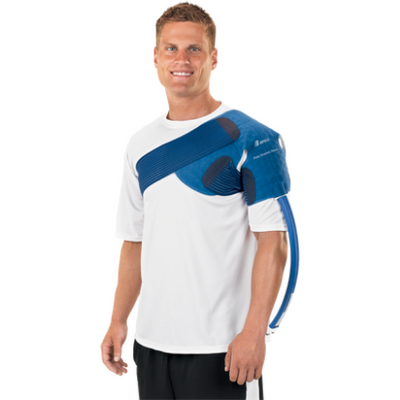
- Put the Articulated Knee Wrap on by first placing it over the affected knee, wrapping the sides around the leg toward the back of the leg as shown above.
- Ensure that the Articulated Knee Wrap has been applied uniformly against the leg and knee with a close and tight fit.
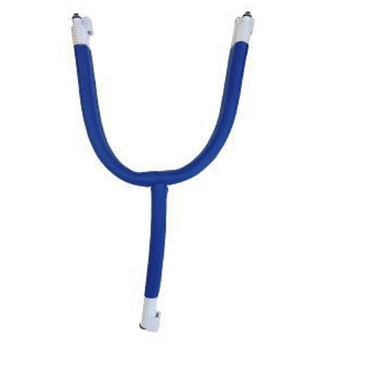
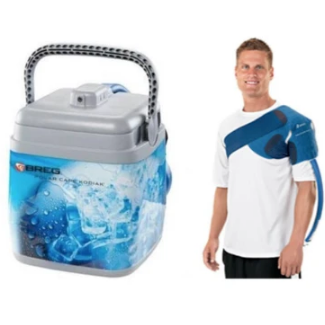
- Attach the Wrap to the Control Unit with the Connector Hose. There should be an audible “click”. To disconnect, simply press the blue or gray button and remove the connector from the Wrap.
**Game Ready orders require an adult signature upon delivery. After two unsuccessful delivery attempts, UPS will return the package to the sender. If you request a redelivery after the package has been returned, an additional shipping fee will apply. If you choose to remove the signature requirement, we are not responsible for lost or stolen packages.
Frequently Asked Questions for Game Ready Ice Machine Wraps/Sleeves
How to clean
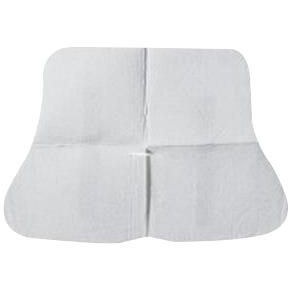
For daily care and to minimize the formation of mildew, remove the Heat Exchanger from Sleeve and wipe with a dry towel to remove any condensation that may form. Turn Sleeve inside out and hang both the Sleeve and Heat Exchanger to release excess moisture. For multi-patient use, if needed, use Sterifab® according to the manufacturer’s instructions to minimize microbe transfer.
For extended care, carefully remove the Heat Exchanger from the Sleeve and turn the sleeve inside out. Hand or machine wash the Sleeve in cold water and mild detergent, or antibacterial soap. Hang to dry. Hand wash the Heat Exchanger with warm water and mild detergent, do not machine wash or place in a dryer. Hang to dry.
Warranty and Average Life Expectancy
The life expectancy of a sleeve and/or heat exchanger will vary widely depending on the frequency of use. Let’s explore some scenarios below
Sleeve
- Light personal use: 12 Months
- Medium Use: 6 Months
- Heavy use (Clinic or training facility): 3 Months
Heat Exchanger
- Light personal use: 24 Months
- Medium Use: 18 Months
- Heavy use (Clinic or training facility): 12 Months
Warranty Information
- Sleeve: In case of manufacturer defect, the sleeve may be returned within 7 days of purchase
- Heat Exchanger: 1 year from purchase date. See warranty card included with Heat Exchanger.
How to Store your Wrap
- Hang your Wrap on a wide hanger or lay flat. Do not fold or stack it, as this could kink the fluid chamber and the Wrap will not work properly.
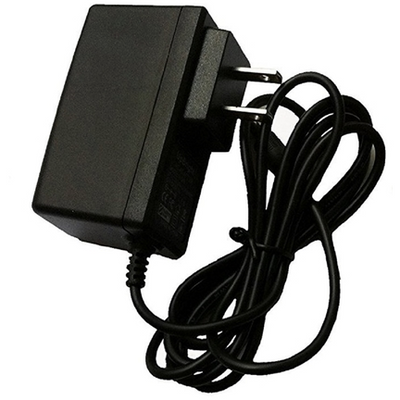
Instructions when you first receive and set up your unit
How to Prime the Wrap:
- With the GRPro 2.1 Control Unitoff, attach the Connector Hose to the Control Unit and the Wrap
- Lay the Wrap open and flat next to the Control Unit (not on the body)
- Turn the System on and run for 2 minutes with No Pressure
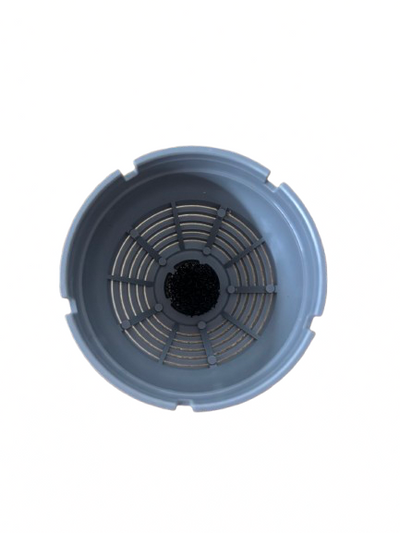
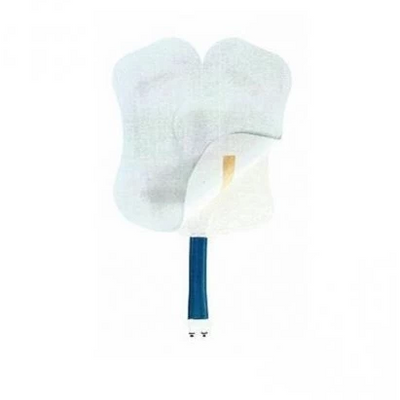
Heat Exchanger Instructions
The Heat Exchanger (PN 520160-03) fits inside the Sleeve (PN 510160) and comes as part of a pre-assembled Wrap (PN 590160-03). If the Heat Exchanger is removed to launder the Sleeve, or for any other reason, please use the following instructions to re-insert the Heat Exchanger into the Sleeve.
- Place the Sleeve on a flat surface with the logo side up, and determine the opening location.
- Insert the Heat Exchanger into the Sleeve with the blue side down (The blue side of the Heat Exchanger should touch the blue side of the Sleeve).
REMOVAL OF HEAT EXCHANGER
- Disconnect the Connector Hose from the Wrap
- Unzip the zipper
- Gently pull out the Heat Exchanger
Be sure the Heat Exchanger is flat inside the Sleeve with no folds or creases. Zip up the Sleeve, if applicable. After assembly, lay the blue side up and ensure the Heat Exchanger is uniformly laid out and smooth inside the Sleeve.
| Shipping | This item ships to 48 states (excluding Hawaii and Alaska) |
| Delivery | Delivery is estimated to be 1-5 days. Choose shipping speed at checkout. Will usually ship same day if ordered by 12 Noon EST |
Description
The Game Ready Knee Sleeves / Wraps
There are 5 core advantages to the design of the Game Ready Wraps and Sleeves and when you are recovering from an injury or trying to achieve peak performance quality design and engineering count. The Game Ready dual-action wraps offer you targeted solutions for injury and surgery recovery.
Let's dive in...
Unlike all other sleeves and wraps, the Game Ready wraps have an inner and outer layer. This is important because if you use the ice machine daily, the wrap will get kinda gross! So the outer sleeve is washable while the inner sleeve is where all of the intelligent design is located. So you can have a cold and clean cold therapy session each and every time.
The sleeves are designed to deliver circumferential therapy. This means that not just the front of your knee gets the cold therapy but the front back and sides as well. Most competing cold therapy systems have a gap in their cold therapy coverage, but not Game Ready!Compression therapy is part of the 3rd generation of cold therapy treatment and Game Ready leads the way by offering pneumatic compression which enables the sleeves to contour to your anatomy.
Speaking of anatomy, you will not see a "universal" wrap in our lineup. That's because Game Ready has specifically engineered all of their wraps to fit your anatomy like a glove. Once you have it on, you will feel the distinct difference between fit and cold.
Finally, the quick-release hoses allow you to snap in and out of your cold therapy treatment quickly. Why struggle when you are trying to recover?Game Ready Knee Wrap Size Chart
|
Description |
Size |
Type |
Catalog # |
|
|
Straight Knee Wrap with ATX (one size fits all) One size – 17” long, 32″ circumference at top, 24” circumference at bottom |
Straight |
590100-03 |
|
|
Articulated Knee Wrap with ATX (one size fits all) |
Articulated |
590100-03 |
POTENTIAL APPLICATIONS
- An anterior cruciate ligament (ACL) injury or surgery
- MCL, PCL, LCL injury or repair
- Meniscus tear or repair
- Uni knee replacement
- Patellar tendon tear
- TKR / TKA total knee replacement or total knee arthroplasty
Articulated Knee Wrap Instruction
- Put the Articulated Knee Wrap on by first placing it over the affected knee, wrapping the sides around the leg toward the back of the leg as shown above.
- Ensure that the Articulated Knee Wrap has been applied uniformly against the leg and knee with a close and tight fit.
- Attach the Wrap to the Control Unit with the Connector Hose. There should be an audible “click”. To disconnect, simply press the blue or gray button and remove the connector from the Wrap.
**Game Ready orders require an adult signature upon delivery. After two unsuccessful delivery attempts, UPS will return the package to the sender. If you request a redelivery after the package has been returned, an additional shipping fee will apply. If you choose to remove the signature requirement, we are not responsible for lost or stolen packages.
Frequently Asked Questions for Game Ready Ice Machine Wraps/Sleeves
How to clean
For daily care and to minimize the formation of mildew, remove the Heat Exchanger from Sleeve and wipe with a dry towel to remove any condensation that may form. Turn Sleeve inside out and hang both the Sleeve and Heat Exchanger to release excess moisture. For multi-patient use, if needed, use Sterifab® according to the manufacturer’s instructions to minimize microbe transfer.
For extended care, carefully remove the Heat Exchanger from the Sleeve and turn the sleeve inside out. Hand or machine wash the Sleeve in cold water and mild detergent, or antibacterial soap. Hang to dry. Hand wash the Heat Exchanger with warm water and mild detergent, do not machine wash or place in a dryer. Hang to dry.
Warranty and Average Life Expectancy
The life expectancy of a sleeve and/or heat exchanger will vary widely depending on the frequency of use. Let’s explore some scenarios below
Sleeve
- Light personal use: 12 Months
- Medium Use: 6 Months
- Heavy use (Clinic or training facility): 3 Months
Heat Exchanger
- Light personal use: 24 Months
- Medium Use: 18 Months
- Heavy use (Clinic or training facility): 12 Months
Warranty Information
- Sleeve: In case of manufacturer defect, the sleeve may be returned within 7 days of purchase
- Heat Exchanger: 1 year from purchase date. See warranty card included with Heat Exchanger.
How to Store your Wrap
- Hang your Wrap on a wide hanger or lay flat. Do not fold or stack it, as this could kink the fluid chamber and the Wrap will not work properly.
Instructions when you first receive and set up your unit
How to Prime the Wrap:
- With the GRPro 2.1 Control Unitoff, attach the Connector Hose to the Control Unit and the Wrap
- Lay the Wrap open and flat next to the Control Unit (not on the body)
- Turn the System on and run for 2 minutes with No Pressure
Heat Exchanger Instructions
The Heat Exchanger (PN 520160-03) fits inside the Sleeve (PN 510160) and comes as part of a pre-assembled Wrap (PN 590160-03). If the Heat Exchanger is removed to launder the Sleeve, or for any other reason, please use the following instructions to re-insert the Heat Exchanger into the Sleeve.
- Place the Sleeve on a flat surface with the logo side up, and determine the opening location.
- Insert the Heat Exchanger into the Sleeve with the blue side down (The blue side of the Heat Exchanger should touch the blue side of the Sleeve).
REMOVAL OF HEAT EXCHANGER
- Disconnect the Connector Hose from the Wrap
- Unzip the zipper
- Gently pull out the Heat Exchanger
Be sure the Heat Exchanger is flat inside the Sleeve with no folds or creases. Zip up the Sleeve, if applicable. After assembly, lay the blue side up and ensure the Heat Exchanger is uniformly laid out and smooth inside the Sleeve.
Shipping
| Shipping | This item ships to 48 states (excluding Hawaii and Alaska) |
| Delivery | Delivery is estimated to be 1-5 days. Choose shipping speed at checkout. Will usually ship same day if ordered by 12 Noon EST |
Size Chart
Reviews


Related Products